
| View All | Search | View Statistics |
 How to make a dragon How to make a dragonArticle by ReBoot, March 09th 2005, 14:18:24 | |
| Hint:
This article doesn't describe the best way to do it, it describes the way I did it. So if you have another idea, don't blame me  Erm, and the sizes can vary, if you want (if someone makes a meter dragon, please make some pics!) Erm, and the sizes can vary, if you want (if someone makes a meter dragon, please make some pics!)
Oh, one important thing. I hope, I don't have to explain how to use a needle. Ok, let's begin. Needed: Drapery (I used an old sheet) Needle Fibre (use a dark one) Paint (grey, of course) Scissors Pen (black, what else?) Preparation of the body: The body consists of 2 ellipses which have a lengh of 20 centimeters and a width of 15 centimeters. After you've cut them out (before cutting, draw them with the pen), put them together and sew their borders together. Don't sew the complete border, let a small opening (like visualised on the first picture). Now, do the same you do with your socks. Pull it through the hole to "take it on the otherside". Finally, write "DRAGON" on it and you're done. Preparation of the legs: We'll need 4 pieces, each rectangular, with a length of 14 and a height of about 8,5 centimeters. Take each piece and crumple it 3 times. Then, sew it , directly through the middle (take a look at the first picture). After you've done that, crumple it again and sew the both borders together, so it looks like a small pipe. If you haven't done anything wrong, your pipe has still a length of 8,5 centimeters. Now, you can pull the fibre you've used in the previous step out and the leg is done. Repeat this 3 times. When you're done, your parts should look like on the second picture. Now, let's complete the dragon. Assembly: Begin with the body, which is pretty simple. Fill it with pieces of drapery, the smaller, the better, to give it it's shape. When you can't fit anything inside the dragon anymore, close the hole (you still have some fibre left, don't you?) Ok, the tricky part begins, the attachment of the legs. You may take a look at the third picture, but I regret, it doesn't visualize it well... Well, you basically pull the needle through the leg (near the end, of course), then you pull it through the stomach, where the leg is supposed to be and through the leg again. After some swearing (or talking with god or your cat), you're went around the leg and should fix the fibre (or make another round, if you want). That's it, basically. Final steps: Since I used an old sheet, the dragon is white now. May be funny, I, personally, don't like white, so I painted it grey (like the HQA dragon). Erm, stop. Before painting, you could pull another fibre trough the dragon's spine, to hang it somewhere. Why? I painted it with water colors, that need time to dry. With this ultimate solution, the dragon could hang around, while drying (and posing for the pictures). Erm, that's it. | 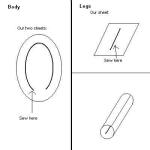 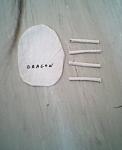 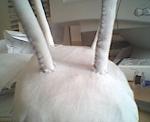 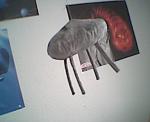 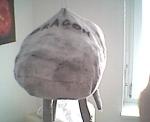 Links: |
| How readers rate this Article: 8.66/10 (12 votes) | |
| If you want to add your comment you must login or register first. | |
| View All | Search | View Statistics |


